The main purpose of local caching is to speed up access to Enterprise projects and reduce time, spent on processing data, while you are working with project files. Let’s walk through the process of caching briefly.
When a plan is checked-out via MS Project, it synchronizes all changes, you have made on this plan in PWA, with its cache version. While the information is up to date, you primarily start to work with the local copy of the project. Now you can update certain details of the plan and these updates are stored in the cache file. Synchronization to PWA occurs when you save or publish your project. Only changed data of the plan will be synced up to its associated version in PWA. However, some users from time to time face an issue, working with plans within Project Desktop. For instance, you may be unable to check-out a project or save the edited version of the plan. Moreover, certain project information may be shown up incorrectly. So, if you are encountering the same problems, try to clean up the local cache.
First, open MS Project and connect to PWA with your usual Project Web App account. Then go to the Backstage page -> Options -> Save.
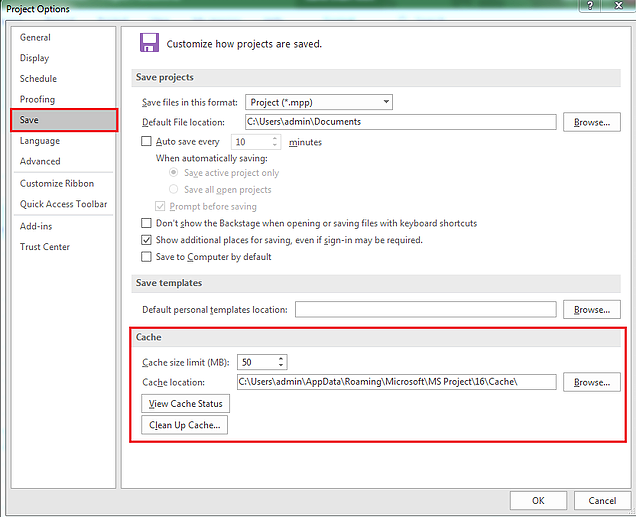
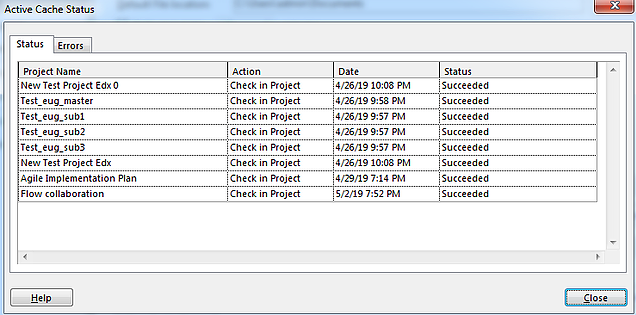
In the Cache section you can, for example, change Cache size limit or view Cache Status (the last actions you took on your project and whether successfully or not they were).
To clean up the cache completely, you should do the following:
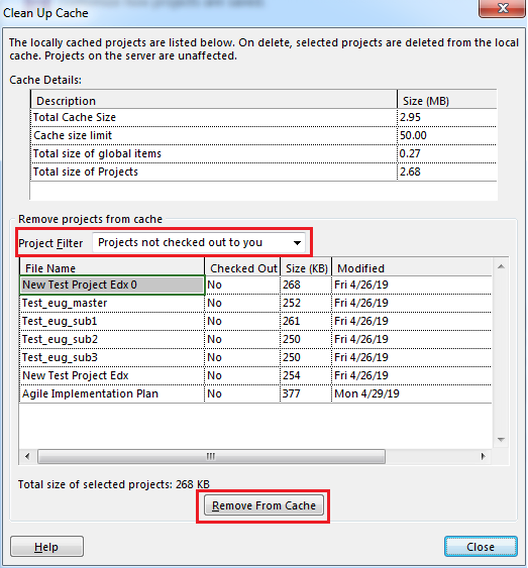
1. In the Cache section on the Save tab click Clean Up Cache. In the appeared dialog box apply Project Filter and remove all project files from the cache whether they are checked-out to you or not. Click Close. You can also delete only some of them if necessary.
2. Copy the Cache location path and close MS Project.

3. Go to the location using Windows Explorer and delete all files there.

Now, you’ve completely cleaned the cache. To have faster access to cache clean up, you can also add the Clean Up Cache command to the ribbon using Backstage page -> Options -> Customize Ribbon.
Happy Learning.
Best Regards,
Team of Managed Services Department
Trusted IT Group
support@trusteditgroup.com